
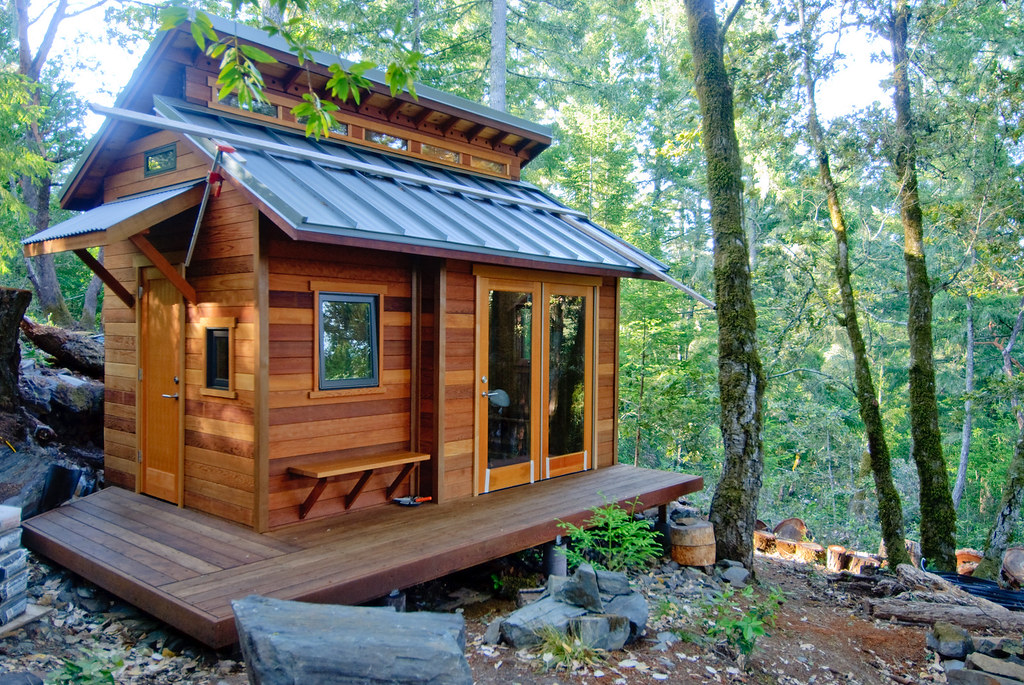
Are you dreaming of a tiny house that maximizes space and functionality? Look no further than the tiny house slide out. This innovative design feature allows you to expand the living area of your tiny house with ease, providing you with the flexibility and comfort you desire. Imagine having an extra room that can slide out whenever you need it, giving you more space for entertaining guests or simply enjoying a larger living area. With a tiny house slide out, you can make the most out of limited square footage without compromising on comfort or style.
Building a tiny house slide out requires careful planning and execution. First, you need to consider the dimensions and weight of the slide out, ensuring that it is compatible with the overall structure of your tiny house. It’s important to consult with a professional builder or engineer to ensure that your design is safe and structurally sound. Additionally, you’ll need to choose the right materials and construction methods to ensure the slide out is durable and able to withstand the test of time. By following these steps and working with experts in the field, you can create a tiny house slide out that not only enhances your living space but also adds value to your home.
To build a tiny house slide out, follow these steps:
- Start by measuring the dimensions of the slide-out area.
- Design and create a sturdy frame using durable materials.
- Attach the frame to your existing tiny house structure securely.
- Add insulation and weatherproofing to ensure comfort and protection.
- Create sliding mechanisms using quality hardware for smooth operation.
- Build the walls, install windows, and doors to complete the slide-out.
- Finish with necessary electrical and plumbing installations.
Introduction
Building a tiny house comes with unique challenges, one of which is creating a functional and space-saving interior. A slide-out feature is an excellent solution to maximize the living space in a tiny house. A slide-out is a section of the tiny house that can be extended or retracted to create additional room when needed. In this article, we will explore the process of building a slide-out for a tiny house, covering everything from planning and design to construction and installation. Whether you are a DIY enthusiast or a professional builder, these steps will guide you through building a functional and efficient slide-out for your tiny house.
1. Planning and Design
The first step in building a slide-out for your tiny house is careful planning and design. This stage involves determining the purpose of the slide-out, considering the available space, and creating a design that fits your specific needs and preferences. Here are four key factors to consider during the planning and design phase:
a. Purpose and Functionality
Before starting the design, it’s essential to define the purpose and functionality of your slide-out. Are you looking to create additional living space, a bedroom, an office, or storage? This decision will impact the dimensions, layout, and features of the slide-out. Consider the activities you plan to undertake in the space and ensure that the design accommodates your needs.
b. Space Evaluation
Measure the available space in your tiny house to determine the maximum size of the slide-out. Consider any constraints such as existing walls, windows, or appliances that may limit the dimensions or placement of the slide-out. Taking accurate measurements will help you create a design that seamlessly integrates with the rest of your tiny house.
c. Design Considerations
When designing your slide-out, take into account the overall aesthetics and architectural style of your tiny house. Ensure that the design blends well with the existing structure and does not compromise the stability or integrity of the house. Consider factors such as materials, insulation, and energy efficiency during this stage of the process.
d. Safety and Structural Integrity
Building a slide-out requires careful attention to safety and structural integrity. Consult a structural engineer or an experienced professional to ensure that the design meets all necessary safety standards. It’s crucial to use quality materials, sturdy construction techniques, and secure mechanisms to ensure that the slide-out functions safely and reliably.
2. Materials and Tools
Once you have a well-planned design, the next step is gathering the necessary materials and tools for building the slide-out. Here are three important considerations:
a. Materials
The materials you choose will depend on your design and budget. Common materials used for slide-out construction include wood, metal, and composite materials. Consider the weight and durability of the materials, as well as their resistance to moisture and other environmental factors. Additionally, select appropriate insulation materials for added energy efficiency.
b. Tools
You will need a variety of tools to complete the slide-out construction. Some essential tools include a measuring tape, drill, saw, level, screws, nails, and safety equipment such as goggles and gloves. Depending on your design, you may also require specialized tools such as a router or a miter saw. Make sure to have all the necessary tools on hand before starting the construction process.
c. Hardware and Mechanisms
In addition to materials and tools, you will need to select suitable hardware and mechanisms for your slide-out. This includes drawer slides, hinges, locks, latches, and any other components necessary for the smooth operation and secure locking of the slide-out. Ensure that the selected hardware matches your design specifications and supports the weight and dimensions of the slide-out.
3. Construction Process
With a solid plan, design, and all the necessary materials and tools in place, it’s time to start the construction process. Here are four steps to guide you through building the slide-out:
a. Frame Construction
Begin by constructing the frame for the slide-out. Use the appropriate measurements and cut the lumber or metal according to your design specifications. Assemble the frame using sturdy construction techniques such as screws, nails, or brackets. Ensure that the frame is square and level to guarantee a smooth and seamless operation.
b. Installation of Slides and Mechanisms
Once the frame is complete, install the drawer slides or other sliding mechanisms according to the manufacturer’s instructions. These slides or mechanisms will facilitate the smooth extension and retraction of the slide-out. Make sure they are securely attached to the frame and operate smoothly without any obstructions.
c. Insulation and Interior Finishing
After the installation of the slides, it’s time to insulate the slide-out for optimal energy efficiency. Use appropriate insulation materials to prevent drafts and regulate temperature within the slide-out. Once the insulation is in place, you can proceed with the interior finishing, such as adding walls, flooring, and any other desired features that align with your design.
d. Exterior Integration
To complete the construction process, integrate the slide-out with the exterior of your tiny house. This involves sealing the gaps and ensuring that the slide-out seamlessly blends with the overall structure of the house. Use weather-resistant materials and techniques to protect the slide-out from the elements and maintain its structural integrity.
4. Installation and Safety Checks
Once the construction is complete, it’s crucial to ensure that the slide-out functions safely and reliably. Here are three important steps for installation and safety checks:
a. Installation and Alignment
Carefully install the slide-out in its designated space within the tiny house. Ensure that it aligns properly with the existing walls and flooring. Use appropriate fasteners and hardware to secure the slide-out to the rest of the structure. Double-check the alignment to guarantee smooth operation and a seamless transition between the slide-out and the main living area.
b. Safety Mechanisms
Install safety mechanisms such as locks or latches to secure the slide-out when it is retracted or extended. These mechanisms will prevent any accidental movements and ensure the slide-out remains in the desired position until intentionally moved. Test the safety mechanisms to confirm their effectiveness and make any necessary adjustments.
c. Functionality Testing
Once the installation and safety measures are in place, thoroughly test the functionality of the slide-out. Open and close it multiple times to ensure smooth operation without any sticking or jamming. Check for any potential issues, such as misaligned slides or loose components, and address them before finalizing the installation.
Exploring Cost-Effective and Efficient Slide-Out Solutions
In addition to the traditional construction process outlined above, there are now cost-effective and efficient slide-out solutions available. These pre-fabricated slide-out units simplify the building process and provide an optimized solution for adding extra space to your tiny house.
When considering these pre-fabricated slide-out units, it’s important to consult with manufacturers or suppliers who specialize in tiny house slide-out systems. They can guide you through the selection process and provide detailed instructions for installation and integration. These solutions not only save time and effort but also ensure a reliable and professionally engineered slide-out for your tiny house.
In conclusion, building a slide-out for a tiny house requires careful planning, design, and construction. By considering the purpose, space evaluation, design considerations, and safety measures, you can create a functional and space-saving slide-out that enhances your tiny house living experience. Whether you choose to build the slide-out from scratch or explore pre-fabricated solutions, the end result will provide additional living space and make the most of your tiny house.
How to Build a Tiny House Slide Out
Building a tiny house slide out can be a challenging yet rewarding project for those looking to maximize space in their tiny home. Here are some steps to guide you through the process:
Step 1: Planning
Start by measuring the available space and considering your needs. Determine the dimensions and design of the slide out based on the furniture or amenities you want to include. Create a detailed plan with measurements and materials needed.
Step 2: Building the Frame
Construct the frame using sturdy materials like wood or metal. Ensure it is robust enough to support the weight of the slide out and any furniture or appliances to be added. Use precise measurements and accurate angles to create a stable structure.
Step 3: Installing the Slide Mechanism
Select the appropriate slide mechanism based on the weight and size of your slide out. Mount the slides securely to the frame, ensuring smooth and easy movement in and out. Test the mechanism for proper functionality before proceeding.
Step 4: Adding Finishing Touches
Complete the slide out by adding insulation, flooring, and any additional features such as windows or storage compartments. Ensure a tight seal when closed to prevent drafts or leaks. Paint or finish the exterior to match the overall style of your tiny house.