
Building a pole barn is a great investment for homeowners who need extra storage space or a covered area for their hobbies. But once it’s built, the question of how to enclose it arises. Enclosing a pole barn can be a challenging task, but with the right materials and techniques, it can be done efficiently and cost-effectively. In this article, we will discuss the steps to take to enclose your pole barn and transform it into a functional and versatile space. So, let’s get started!
Enclosing a pole barn can be done in four steps. First, install insulation on the walls and ceiling. Next, add a vapor barrier to prevent moisture buildup. Then, add framing to create walls. Finally, add siding to the exterior. With these steps, you can turn your pole barn into a comfortable and functional space.
How to Enclose a Pole Barn: A Comprehensive Guide
If you own a pole barn, you know how useful it can be for storing equipment, housing animals, or even as a workshop. However, an open pole barn can leave your belongings exposed to the elements and vulnerable to theft. To protect your investment, it’s important to enclose your pole barn properly. In this article, we’ll explore the different methods for enclosing your pole barn and the benefits of each option.
Option 1: Metal Panels
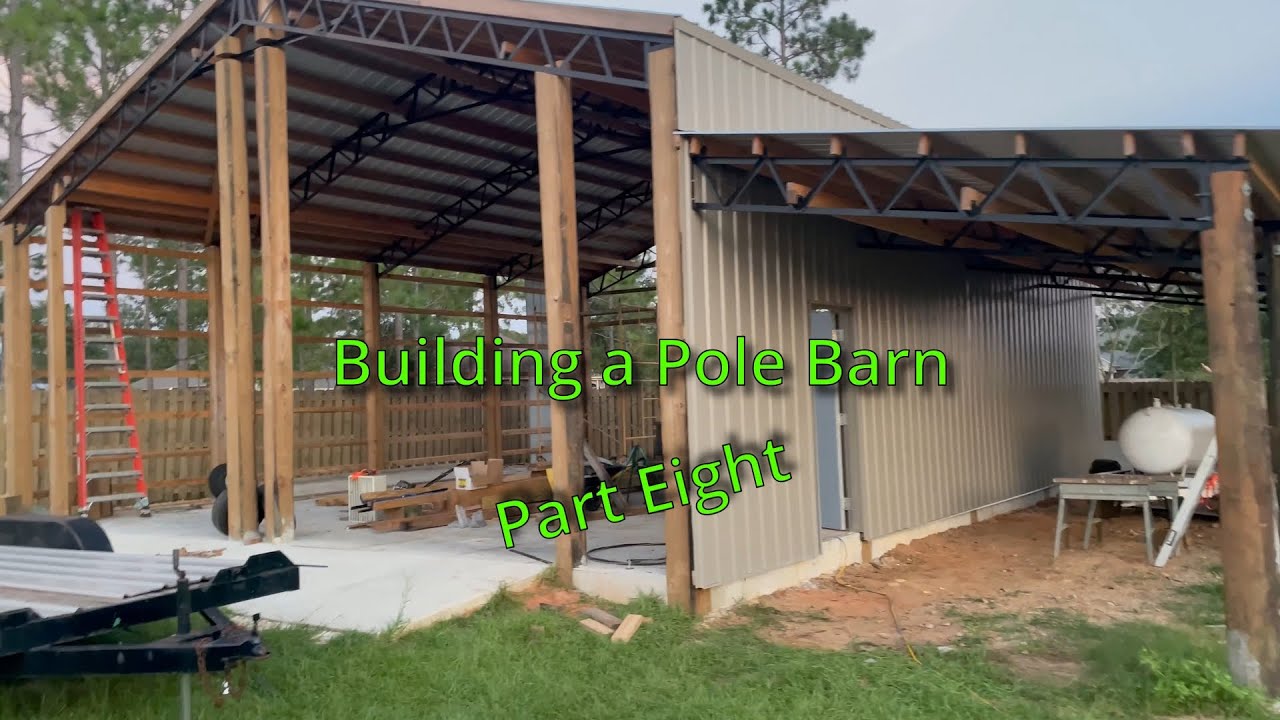
Metal panels are a popular choice for enclosing pole barns due to their durability and low maintenance requirements. They come in a variety of colors and can be customized to fit your barn’s dimensions. Metal panels can be attached directly to the framing of your barn or to an existing exterior wall.
To install metal panels, you’ll need to measure the length and width of your barn to determine how much material you’ll need. You’ll also need to purchase screws, a drill, and a saw to cut the panels to size. Once you have your materials, you can begin attaching the panels to your barn’s framing.
Benefits: Metal panels are fire-resistant, wind-resistant, and can last up to 50 years with proper maintenance. They’re also easy to clean and won’t rust or corrode.
Vs: Metal panels can be more expensive than other enclosure options, and they can be noisy during heavy rain or hail.
Option 2: Wood Siding
Wood siding is a classic choice for enclosing pole barns, and it can give your barn a rustic look. Wood siding comes in a variety of styles, including board and batten, clapboard, and shiplap. It can be painted or stained to match your existing structures.
To install wood siding, you’ll need to measure the length and width of your barn to determine how much material you’ll need. You’ll also need to purchase screws, a drill, and a saw to cut the boards to size. Once you have your materials, you can begin attaching the boards to your barn’s framing.
Benefits: Wood siding is a natural insulator, which can help regulate the temperature inside your barn. It’s also a more affordable option than metal panels.
Vs: Wood siding requires more maintenance than metal panels, as it’s susceptible to rot, termites, and other pests. It’s also less durable than metal and can be more difficult to clean.
Option 3: Vinyl Siding
Vinyl siding is a low-maintenance option for enclosing pole barns. It comes in a variety of colors and styles and can be customized to fit your barn’s dimensions. Vinyl siding can be attached directly to the framing of your barn or to an existing exterior wall.
To install vinyl siding, you’ll need to measure the length and width of your barn to determine how much material you’ll need. You’ll also need to purchase screws, a drill, and a saw to cut the panels to size. Once you have your materials, you can begin attaching the panels to your barn’s framing.
Benefits: Vinyl siding is resistant to fading, cracking, and warping, and it requires minimal maintenance. It’s also less expensive than metal panels.
Vs: Vinyl siding can be less durable than metal panels and more prone to damage from hail or other weather events. It’s also not as fire-resistant as metal panels.
Option 4: Concrete Block
Concrete block is a more permanent option for enclosing pole barns. It’s a good choice for barns that will be used for storage or as a workshop. Concrete block can be painted or stuccoed to match your existing structures.
To install concrete block, you’ll need to excavate a foundation around your barn and pour a concrete footer. You’ll then need to lay the concrete blocks and mortar them together. Once the blocks are in place, you can add a cap to the top of the wall to finish the look.
Benefits: Concrete block is fire-resistant, wind-resistant, and can last for decades with minimal maintenance. It’s also a good option for barns that need to be insulated.
Vs: Concrete block is more expensive than other enclosure options, and it’s not as easy to install. It’s also less customizable than other options.
Option 5: Insulated Panels
Insulated panels are a good choice for pole barns that need to be climate-controlled. They consist of a layer of insulation sandwiched between two metal panels. Insulated panels can be attached directly to the framing of your barn or to an existing exterior wall.
To install insulated panels, you’ll need to measure the length and width of your barn to determine how much material you’ll need. You’ll also need to purchase screws, a drill, and a saw to cut the panels to size. Once you have your materials, you can begin attaching the panels to your barn’s framing.
Benefits: Insulated panels can help regulate the temperature inside your barn and reduce your energy costs. They’re also durable and require minimal maintenance.
Vs: Insulated panels can be more expensive than other enclosure options, and they can be more difficult to install. They’re also less customizable than other options.
Option 6: Polycarbonate Panels
Polycarbonate panels are a lightweight and durable option for enclosing pole barns. They come in a variety of colors and can be customized to fit your barn’s dimensions. Polycarbonate panels can be attached directly to the framing of your barn or to an existing exterior wall.
To install polycarbonate panels, you’ll need to measure the length and width of your barn to determine how much material you’ll need. You’ll also need to purchase screws, a drill, and a saw to cut the panels to size. Once you have your materials, you can begin attaching the panels to your barn’s framing.
Benefits: Polycarbonate panels are lightweight, impact-resistant, and can be more affordable than other options. They’re also easy to install and require minimal maintenance.
Vs: Polycarbonate panels can be less durable than metal panels and more prone to damage from hail or other weather events. They’re also less customizable than other options.
Option 7: Fabric Enclosure
Fabric enclosures are a temporary option for enclosing pole barns. They consist of a durable fabric stretched over a metal frame. Fabric enclosures can be customized to fit your barn’s dimensions and can be installed and removed quickly.
To install a fabric enclosure, you’ll need to purchase a frame kit and fabric cover. You’ll then need to assemble the frame and stretch the fabric cover over it. Once the cover is in place, you can secure it to the frame with bungee cords or other fasteners.
Benefits: Fabric enclosures are affordable, easy to install, and can be removed when not needed. They’re also customizable and can be used for a variety of purposes.
Vs: Fabric enclosures are not as durable as other options and may need to be replaced more frequently. They’re also not as secure as other options and may be more vulnerable to theft.
Option 8: Chain Link Fence
Chain link fence is a simple and affordable option for enclosing pole barns. It can be used to create a perimeter around your barn or to secure individual areas. Chain link fence comes in a variety of heights and can be customized to fit your barn’s dimensions.
To install chain link fence, you’ll need to measure the length and width of your barn to determine how much material you’ll need. You’ll also need to purchase fence posts, a fence fabric roll, and hardware to attach the fence to your barn. Once you have your materials, you can begin installing the fence.
Benefits: Chain link fence is affordable, easy to install, and can be customized to fit your needs. It’s also see-through, which can help deter theft.
Vs: Chain link fence is not as secure as other options and can be easier to cut or climb. It’s also not as durable as other options and may need to be replaced more frequently.
Option 9: Brick
Brick is a more permanent option for enclosing pole barns. It’s a good choice for barns that will be used for storage or as a workshop. Brick can be painted or left natural to match your existing structures.
To install brick, you’ll need to excavate a foundation around your barn and pour a concrete footer. You’ll then need to lay the brick and mortar it together. Once the brick is in place, you can add a cap to the top of the wall to finish the look.
Benefits: Brick is fire-resistant, wind-resistant, and can last for decades with minimal maintenance. It’s also a good option for barns that need to be insulated.
Vs: Brick is more expensive than other enclosure options, and it’s not as easy to install. It’s also less customizable than other options.
Option 10: Combination
You can also combine different enclosure options to create a unique look for your pole barn. For example, you could use metal panels on the sides of your barn and wood siding on the front. Or you could use concrete block on the bottom half of your barn and vinyl siding on the top half.
To create a combination enclosure, you’ll need to determine which materials you want to use and how you want to arrange them. You’ll then need to measure your barn and purchase the necessary materials. Once you have your materials, you can begin installing your combination enclosure.
Benefits: A combination enclosure can give your barn a unique look and can be customized to fit your preferences.
Vs: A combination enclosure can be more expensive than other options, and it can be more difficult to install. It’s also less uniform than other options and may not appeal to everyone.
In conclusion, there are many different options for enclosing your pole barn. The best option for you will depend on your budget, preferences, and the purpose of your barn. Whether you choose metal panels, wood siding, or a combination of materials, enclosing your pole barn will help protect your investment and ensure that it lasts for years to come.
Frequently Asked Questions
Enclosing a pole barn is a great way to add more functionality to your structure. Many people have questions about the process of enclosing a pole barn. Here are the answers to some of the most frequently asked questions:
What are the Benefits of Enclosing a Pole Barn?
Enclosing a pole barn can provide many benefits. Not only does it increase the functionality of the space, but it can also provide added protection for your belongings. An enclosed pole barn can keep out pests, weather, and other potential hazards. Additionally, enclosing a pole barn can increase the resale value of your property.
What Materials are Needed to Enclose a Pole Barn?
The materials needed to enclose a pole barn will vary depending on your specific needs. Some common materials include metal siding, insulation, windows, doors, and roofing materials. It is important to consider the climate in your area and the purpose of the enclosed space when deciding on materials.
What is the Cost of Enclosing a Pole Barn?
The cost of enclosing a pole barn will depend on a variety of factors, including the size of the barn, the materials used, and the complexity of the project. On average, enclosing a pole barn can cost anywhere from $5,000 to $20,000 or more. It is important to get multiple quotes from contractors to ensure you are getting a fair price.
Do I Need a Building Permit to Enclose a Pole Barn?
In most cases, yes, you will need a building permit to enclose a pole barn. The exact requirements for permits will vary depending on your location, so it is important to check with your local building department. Failing to obtain the necessary permits can result in fines, penalties, and legal issues.
How Long Does it Take to Enclose a Pole Barn?
The time it takes to enclose a pole barn will depend on the size of the barn, the materials used, and the complexity of the project. On average, it can take anywhere from a few days to several weeks to complete the project. It is important to work with a reputable contractor and to have a clear timeline in place before beginning the project.
We’re framing walls under our pole barn!!
In conclusion, enclosing a pole barn is a great way to add additional space to your property, protect your equipment and belongings from the elements, and increase the value of your home. With the right materials and techniques, you can create a comfortable and functional living space that meets your needs and budget.
Whether you’re planning to use your pole barn for storage, a workshop, or as a guest house, there are a variety of options available to help you achieve your goals. From insulation and heating to windows and doors, it’s important to consider all of the factors that will impact the comfort and functionality of your space.
Ultimately, the key to success when enclosing a pole barn is to work with a reputable contractor who has experience in this area. By partnering with an expert, you can ensure that your project is completed on time, on budget, and to your satisfaction. So why wait? Start exploring your options today and turn your pole barn into the space of your dreams!